Installing a solar security camera is a smart, eco-friendly way to protect your home or business. This guide will walk you through the process with simple, step-by-step instructions. Solar security cameras are gaining popularity because they’re reliable and efficient. Whether you own a home or a business, you’ll learn how to set up your solar security camera easily.
Key Takeaways
- Understand the functionality and benefits of solar security cameras
- Learn to choose the right solar security camera for your needs
- Prepare with necessary tools and Wi-Fi requirements
- Follow detailed, step-by-step installation instructions
- Configure settings and troubleshoot common issues effectively
Understanding Solar Security Cameras
Solar security cameras are a green way to boost your home’s security. They use the sun’s energy, cutting down on electricity use. This makes them a great choice for those who want to save energy and the planet.
What are Solar Security Cameras?
Solar security cameras have solar panels that turn sunlight into power. This answers the question: how do wireless security cameras get power? They store this energy in batteries, working even when it’s cloudy or dark. This means you can place them anywhere, without needing a power outlet.
Benefits of Solar Security Cameras
These cameras are good for the environment. They use clean energy, reducing carbon emissions from traditional systems. They also save money by cutting down on electricity costs. Plus, they’re easy to install, without the need for lots of wiring.
Popular Types of Solar Security Cameras
Choosing between wired or wireless security cameras can be tough. Solar options are often the best choice. Models like the Ring Stick Up Cam Solar, Reolink Argus 2, and Arlo Pro 3 offer great features. They have high-quality video, motion detection, and night vision, making them a solid security solution.
Choosing the Right Solar Security Camera
When picking a solar security camera, it’s key to know what you need. Look at camera resolution, storage, and how it connects. These things help find the perfect camera for you.
Key Features to Look For
First, think about the camera’s resolution. High resolution means clearer pictures. This makes it easier to see faces and details.
Also, check how it stores footage. Does it use cloud storage or an SD card? And is it easy to connect? Many like a solar CCTV camera with sim card for its freedom from Wi-Fi.
Comparing Different Models
It’s smart to look at different solar security cameras. Some, like the 4g PTZ solar camera, move and zoom. Others have IR night vision for better security at night.
Make sure to check the battery life and if it’s weatherproof. This ensures it works well in all kinds of weather.
Reviews and Recommendations
Looking at what others say can help a lot. Users often talk about how do I install a solar camera and how well it works. Their feedback can help you see if a camera is as good as it seems.
By looking closely at features and comparing models, you can choose wisely. And reading what others say helps make sure you’re making the right choice for your security needs.
Preparing for Installation
Before you start installing your solar security camera, make sure you’re ready. This step is crucial for a smooth installation. You’ll need the right tools, the best spot for your camera, and to check if you have the right connection.
Gathering Necessary Tools
To install your solar security camera, you’ll need some tools. You’ll need a drill, screws, a screwdriver, and a measuring tape. You might also need a ladder for higher spots. Having everything ready will save you time and trouble.
Selecting the Best Location
Finding the right spot for your camera is key. It should be where it can see a lot and get lots of sunlight. Think about where people come and go. Make sure nothing blocks the sun from reaching your camera.
Checking Wi-Fi and Connectivity Requirements
Do solar security cameras need wifi? Usually, yes. So, make sure your Wi-Fi is strong where you’ll put the camera. A weak signal can mess up how well your camera works. If needed, get a Wi-Fi extender to improve your signal.
Here’s a quick checklist to make sure you’re ready:
- Tool assembly (drill, screws, screwdriver, measuring tape, ladder)
- Optimal location for sunlight and coverage
- Verify Wi-Fi signal strength
Getting ready is important for a smooth camera installation. Good planning will make your solar security system work better, keeping your home safe.
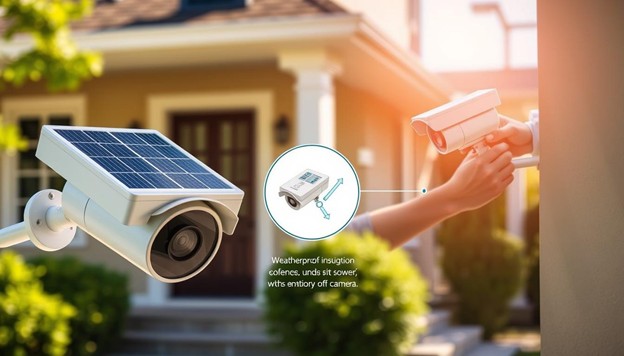
Step-by-Step Guide to Installation: How to Install Solar Security Camera
To ensure a smooth installation, follow a structured approach. Here’s a detailed guide to help you set up your solar security camera system effectively.
- Unbox and Inspect: Start by unboxing your solar security camera kit. Check that you have all parts, like the camera, solar panel, and mounting hardware. Look at the wifi intelligent solar energy alert ptz camera user manual to make sure everything is there.
- Initial Setup: Mount the camera in your chosen spot. Use the screws and brackets provided. Adjust the camera angle to ensure the area you want to monitor is visible.
- Mounting the Solar Panel: Choose a spot for the solar panel where it gets lots of sunlight. Use the mounts to secure it and adjust for the best sun exposure.
- Connecting the Solar Panel to the Camera: Connect the solar panel to the camera using the cables provided. This keeps your device powered up. Check the wifi intelligent solar energy alert ptz camera user manual for wiring details.
- Power On and Test: Power on your camera after connecting everything. Make sure it’s getting power from the solar panel. Test the camera’s features like motion detection and video recording.
After setting up physically, connect and configure the camera through your mobile device. Here’s how to connect your solar camera to your phone:
- Download the App: Get the manufacturer’s app on your smartphone. It’s available for both iOS and Android.
- Account Setup: Create an account or log in if you already have one. Follow the app’s instructions to start the camera setup.
- Camera Configuration: Use the app to find your camera. This might involve scanning a QR code or entering a unique code.
- Wi-Fi Connection: Connect your camera to your home Wi-Fi. Make sure it’s close to your router for a stable connection. Check the wifi intelligent solar energy alert ptz camera user manual for any connection issues.
After connecting successfully, you can watch live footage, get alerts, and customize settings from your phone. This ensures a smooth user experience.
Mounting the Solar Panel
Mounting the solar panel is key when setting up PTZ solar cameras. It’s important to place it right to catch the most sunlight. This affects how fast the solar panel can charge your security camera.
Choosing the Optimal Angle
Solar panels work best at angles between 30 to 45 degrees. This depends on where you live. In the U.S., aiming the panel at your latitude angle is usually best. It helps catch sunlight all day long.
Make sure the panel isn’t blocked by trees, buildings, or other things. A clear view of the sky is crucial for getting the most sunlight.
Securing the Solar Panel
To keep the solar panel in place, use strong mounting brackets. These are usually included in solar panel kits. They help hold the panel steady. Check that the panel is still secure over time.
How long it takes to charge a camera battery varies. It depends on how much sunlight it gets and how efficient the panel is. Knowing this helps you understand how long charging will take.
Connecting the Camera to the Solar Panel
After mounting the solar panel, connect the camera to it. This makes sure your camera runs on solar power all the time.
Wiring Instructions
Start by finding the power cable from the solar panel and the camera’s input connector. Match the positive and negative terminals correctly.
- Strip the wire ends to show the copper inside.
- Connect the positive wire from the solar panel to the camera’s positive terminal.
- Do the same for the negative wire, making sure it’s secure.
Make sure the wires are not damaged and the connections are strong. Check your camera’s manual for more on how do you install a solar panel on a camera.
Testing the Connection
After wiring, test the connection to see if it works. Turn on the camera and check if the light turns on.
- Ensure the camera gets enough power from the solar panel.
- Use the intelligent solar energy alert PTZ camera app to see if it’s working.
- If it doesn’t turn on, check the wiring again.
These tests will make sure your solar-powered camera is working right and ready to go.
Configuring the Camera Settings
After installing your solar security camera, setting it up right is key for it to work well. Here’s how to set up the app and adjust motion detection and alerts for the best results.
Setting Up the App
First, download the app from the Apple App Store or Google Play Store. Then, follow these steps:
- Create an Account: Sign up with a valid email and a strong password.
- Scan QR Code: Use the app to scan the QR code on your camera to link it to your account.
- Sync Camera: Follow the app’s instructions to connect the camera to your phone. Many models let you set it up via Bluetooth or hotspot, even without Wi-Fi.
Adjusting Motion Detection and Alerts
Setting up motion detection and alerts right means you get alerts on time without too many false alarms. Here’s how to do it in the app:
- Motion Sensitivity: Go to the motion detection tab and adjust the sensitivity slider. High sensitivity catches small movements, while low sensitivity cuts down on false alarms.
- Zones: Choose specific areas in the camera’s view where you want to detect motion. This stops alerts from places like sidewalks or streets.
- Alert Preferences: Pick how you want to get alerts—push notifications, emails, or in-app messages. Customize it to fit your daily life for better security monitoring.
Customizing your settings to fit your needs makes your solar security camera work better. Knowing how to set these up helps answer questions like can i connect my security camera to my phone without wi-fi? and more, making your system work well even without constant Wi-Fi.
Troubleshooting Common Issues
Fixing solar security cameras is easy if you know the basics. One big issue is the power supply. Many wonder, do all security cameras need to be plugged in. But, solar models usually don’t need a plug. Just make sure the solar panel gets enough sunlight.
Dust and dirt on the panel can block sunlight. So, clean it often to keep it working well.
Motion detection can be tricky. If your camera is too sensitive, adjust the settings in the app. This helps you control what it catches.
If it misses motion, check for firmware updates. New updates can make your camera work better.
https://www.youtube.com/watch?v=Wg9bbibvdI4
Connection problems are common too. Make sure your camera is close to your Wi-Fi router. Resetting both devices might fix the issue.
If the signal is weak, think about getting a Wi-Fi extender. It can help strengthen your connection.
Firmware issues can cause camera problems. Keep your camera’s firmware up to date. If it still doesn’t work, try a factory reset. This sets it back to its original settings.
Conclusion
Installing a solar security camera is a smart move for your home. It’s good for the planet and works well. By following our guide, you can set up a system that keeps your home safe without using a lot of power.
Solar security cameras are great for the environment. They use the sun’s energy, cutting down on carbon emissions. Plus, they keep working even when the power goes out. They also connect wirelessly and can be part of your smart home, making it easy to watch over your property.
We hope you now feel ready to install a solar security camera. Going green with your home security is good for the planet and keeps your home safe. Solar cameras are a smart choice for any homeowner looking to save energy and stay protected.
FAQ
How do I install a solar security camera?
To install a solar security camera, start by gathering the tools you need. Choose a spot that gets lots of sunlight. Mount the solar panel and connect the camera to it.Follow the instructions from the manufacturer for wiring and setup.
How do you install a solar security camera on a wall?
To install a solar security camera on a wall, first, drill holes for the mounting bracket. Then, screw the bracket into place. Attach the camera to the bracket.Make sure the solar panel gets enough sunlight.
Do solar security cameras need Wi-Fi?
Not all solar security cameras need Wi-Fi. Some use 4G and a SIM card for connection. But, Wi-Fi models need internet for remote access and streaming.
How do I connect a solar camera to my phone?
To connect a solar camera to your phone, download the app from the App Store or Google Play. Follow the app’s setup instructions. This usually involves scanning a QR code and setting up the camera through the app.
What is a 4G PTZ solar camera?
A 4G PTZ solar camera is a solar-powered camera with 4G connectivity. It has PTZ (Pan-Tilt-Zoom) features. You can control the camera’s angle and zoom with a mobile app or web interface.
How long does it take for a solar panel to charge a security camera?
The time to charge a security camera varies. It depends on the camera’s battery and sunlight. On average, it takes a few hours to a full day of sunlight for a full charge.
Can I connect my security camera to my phone without Wi-Fi?
Yes, with a 4G-capable camera, you can connect it to your phone without Wi-Fi. Use a SIM card with a data plan. The camera will stream video and send alerts over cellular data.
Do all security cameras need to be plugged in?
No, not all cameras need to be plugged in. Solar cameras charge from sunlight, and battery-powered cameras are cordless.
How do wireless security cameras get power?
Wireless cameras get power in different ways. Some have rechargeable batteries, while others use solar panels or plug-in adapters. Solar cameras rely on sunlight, and battery models need recharging.
How do you install a solar panel on a camera?
To install a solar panel, find a sunny spot. Use brackets and screws to secure the panel. Connect the panel to the camera with the provided cables for efficient charging.